Showing posts with label Dessert. Show all posts

Tuesday, April 14, 2020

Gingerbread Loaf Recipe

I got this recipe in January and tried it out right away. We are sort of getting into the old ruts but I decided that I was going to try this one as soon as I saw it so I printed it out right away.  I added it to my weekend to do list and I actually got it done.  Of course I totally didn't post any of the pictures to share with you.  Now I am inside and trying to get caught up on all of the things on my to do list and I decided that even though the weather is getting warmer, it is about time that I shared this amazing gingerbread and it made me want to make it again.  Check out the original recipe here.


I got out all of the ingredients that we needed which are all pantry staple ingredients for us.


I measured to put the molasses in the bowl.


I put the molasses and the butter in the bowl. 


I added hot water which melted down the butter.


It was super easy to mix together after everything melted.


I got the butter fully melted and it was so fragrant and nicely thinned out so it wouldn't be so sticky to pour into the dry ingredients.


I mixed the dry ingredients in the mixing bowl.  Of course I used the one on the mixer but then looked back and realized that I totally didn't need a mixer for this recipe because the liquid ingredients were all smooth so this was easy to mix together.


Since I already had it in the blender, I figured that I would use it.  I added the liquid ingredients to the dry ingredients and mixed.


It mixed up to look like a bread already and smelled even more amazing.


I put it in the greased bread pan ready to bake.


Did I mention how great it smelled?  I might have cut into it before I actually took a picture.  Oops!!  It turned out really dark brown and made the house smell amazing.


The best part is that I really wanted to have gingerbread and this was wonderful rich option.


My husband said that he kept looking at it and thinking that it was chocolate cake so he wasn't as excited about it because it obviously didn't taste like chocolate cake.  It tasted like yummy gingerbread and I can't wait to make it again.

Classic Gingerbread Loaf 


Ingredients
  • 2/3 Cup Boiling Water
  • 2/3 Cup Molasses
  • 1/4 Cup Unsalted Butter
  • 1 Large Egg
  • 1 1/2 Cups All Purpose Flour
  • 1/2 Tsp Salt
  • 2 Tsp Ground Ginger
  • 1 Tsp Ground Cinnamon
  • 1/4 Tsp Ground Cloves
  • 1 Tsp Baking Soda

Instructions : 

Preheat oven to 350° and grease loaf pan.  Combine wet ingredients in one bowl, add molasses and butter. Add boiling water and stir until butter melts and all is combined. Put boiling water in measuring cup used to add molasses to clean the cup and get every last drop of molasses. Allow to cool while combining dry ingredients.  Combine dry ingredients in another bowl, combine flour, salt, ginger, cinnamon, cloves, and baking soda. Whisk until combined. 

When bowl of wet ingredients is cool to the touch, whisk in egg. Pour wet ingredients into bowl of dry ingredients. Stir to make batter.  Pour batter into greased pan. Bake for 35 minutes or until toothpick inserted in middle comes out dry.

Wednesday, April 8, 2020

Katie's Cut Out Cookies

My friend Katie makes these cookies which I love when she makes... of course isn't everything better when someone else puts in all the effort.  I didn't make this forever because I just wanted to eat hers but we needed some cut out cookies so I decided that I would make her recipe.  My family has declared it a new favorite recipe required for every special event and just sometimes when we are stuck in the house.

My son helped me make them the last few times so these pictures when I made them without a helper.  Of course whenever I pull out the ingredients, he comes running to help.


I put the butter and sugar in the bowl to cream together.


 I mixed until it was nice and creamy.


 I added the eggs and the vanilla.


I measured the dry ingredients to get them ready to add to the mixture.


I added all of the dry ingredients and mixed until combined.


The dough comes together easily and then you scrape down the sides and put it in the fridge overnight or at least until it is really cooled and ready to be rolled out.


We floured the surface and rolled out the cookies but I don't have an pictures of this for any of the times that I have made them.  Last time we made Virginia, candy cane, gingerbread men, and hearts.  My son picked the shapes so he was excited to cut them out and bake them.


This time, we decided to go with an Easter theme so we had two different bunnies, two different flowers, a butterfly, and ice cream cone. Super glad to have lots of spring sprinkles in the cupboard. 


We love to decorate upfront before baking so that they don't have to be decorated when they come out.  Although my husband likes his plain without any sprinkles so if he doesn't finish all his then we put frosting on them.  As always, these cookies are a home run. Everyone had lots of cookies and I hope that you try these for your own family.  Everyone I know who tried them thinks that they are a home run!

Katie's Cut Out Sugar Cookies

Dough

1 cup butter
1 cup sugar
2 eggs
1tsp vanilla extract (although she adds more)
3 cups flour
1/2 tsp baking soda
1 tsp baking powder
1 tsp salt

Cream together butter and sugar.  Add eggs and vanilla, beating well.  Add dry ingredients.  Cool in fridge before rolling out (I usually do this over night).  Roll out, cut into desired shapes, then cook at 350 for about 8 minutes.  Cool before frosting

Frosting

1/3 cup butter (must be room temperature!)
3 cups powdered sugar
1 1/2 tsp Vanilla extract
at least 2 tbsp  heavy whipping cream

Blend butter (again, make sure its room temperature) and powdered sugar.  Add vanilla.  Add whipping cream and then keep adding little bits at a time while mixing until desired consistency.

Wednesday, March 25, 2020

Rice Krispy Treats

One of our family favorites is Rice Krispy Treats.  We don't have them very often but when we do, they go quickly.  The best part is that one box of cereal makes two batches of treats so we get to have them twice as long as I remember to buy two bags of marshmallows and the great news is that I did.  I bought this special treat because we were making our last trip to the store before school was out for 4 weeks.  I didn't know exactly what that was going to entail but we decided to go with a recipe a day as part of the our home school fun.  This was one of our home ec lessons after a box of brownies, homemade pizza, and before homemade bread.  I can't wait to find out what other things we are going to make together while we are home for awhile.


My helper melted butter in the pot and added the marshmallows when it was melted.  Then stirred to make sure all the marshmallows (that he didn't already eat) were coated in butter.


He stirred and stirred but said that he thought it was done.  It wasn't done and that he wanted some help to get it finished.


We melted until smooth and he saw that it looked a little different when you were patient for it to melt all the way.


We removed it from heat and he decided that he was in charge of pouring in the rice krispies and I was in charge of stirring.


We added 4 cups and then stirred.  Then my son added the last 2 cups.  I stirred until they were all coated.


My son used the butter wrapper to grease the pan on the bottom so nothing would stick.  I held the pot while he scraped the rice krispies into the pan. He used the same butter wrapper to press the krispie treats flat.  I showed him that if you pressed a little more then it would help the treats stay together better.


He enjoyed eating the spoon and what was left in the pot while the bars cooled.  We enjoyed them a lot and my son was really happy to know that we could make another batch soon.

Rice Krispy Treats

Ingredients

  • 3 tablespoons butter
  • 1 10 oz package or 4 cups Mini-Marshmallows
  • 6 cups Rice Krispies cereal

Directions

1. In large saucepan, melt butter over medium heat. Add marshmallows and stir until completely melted. Remove from heat.
2. Add Rice Krispies cereal. Stir until well coated.
3. Using wax paper or butter wrapper evenly press mixture into 13 x 9 x 2-inch pan coated with butter. Cool. Cut into squares

Tuesday, January 24, 2017

Orange Lemon Cookies

I was looking for something to make for Christmas and my aunt sent me a few recipes from my grandmother for me to choose from.  My husband decided that we would go with the Orange Lemon Cookies.


 I was making the cookies with my mother and husband so I totally forgot to take pictures!!  We used the microplaner to grate the orange peel and my husband juiced the citrus fruit.  My mom mixed all the ingredients in the mixer to get the dough ready (so no pictures there...sorry).

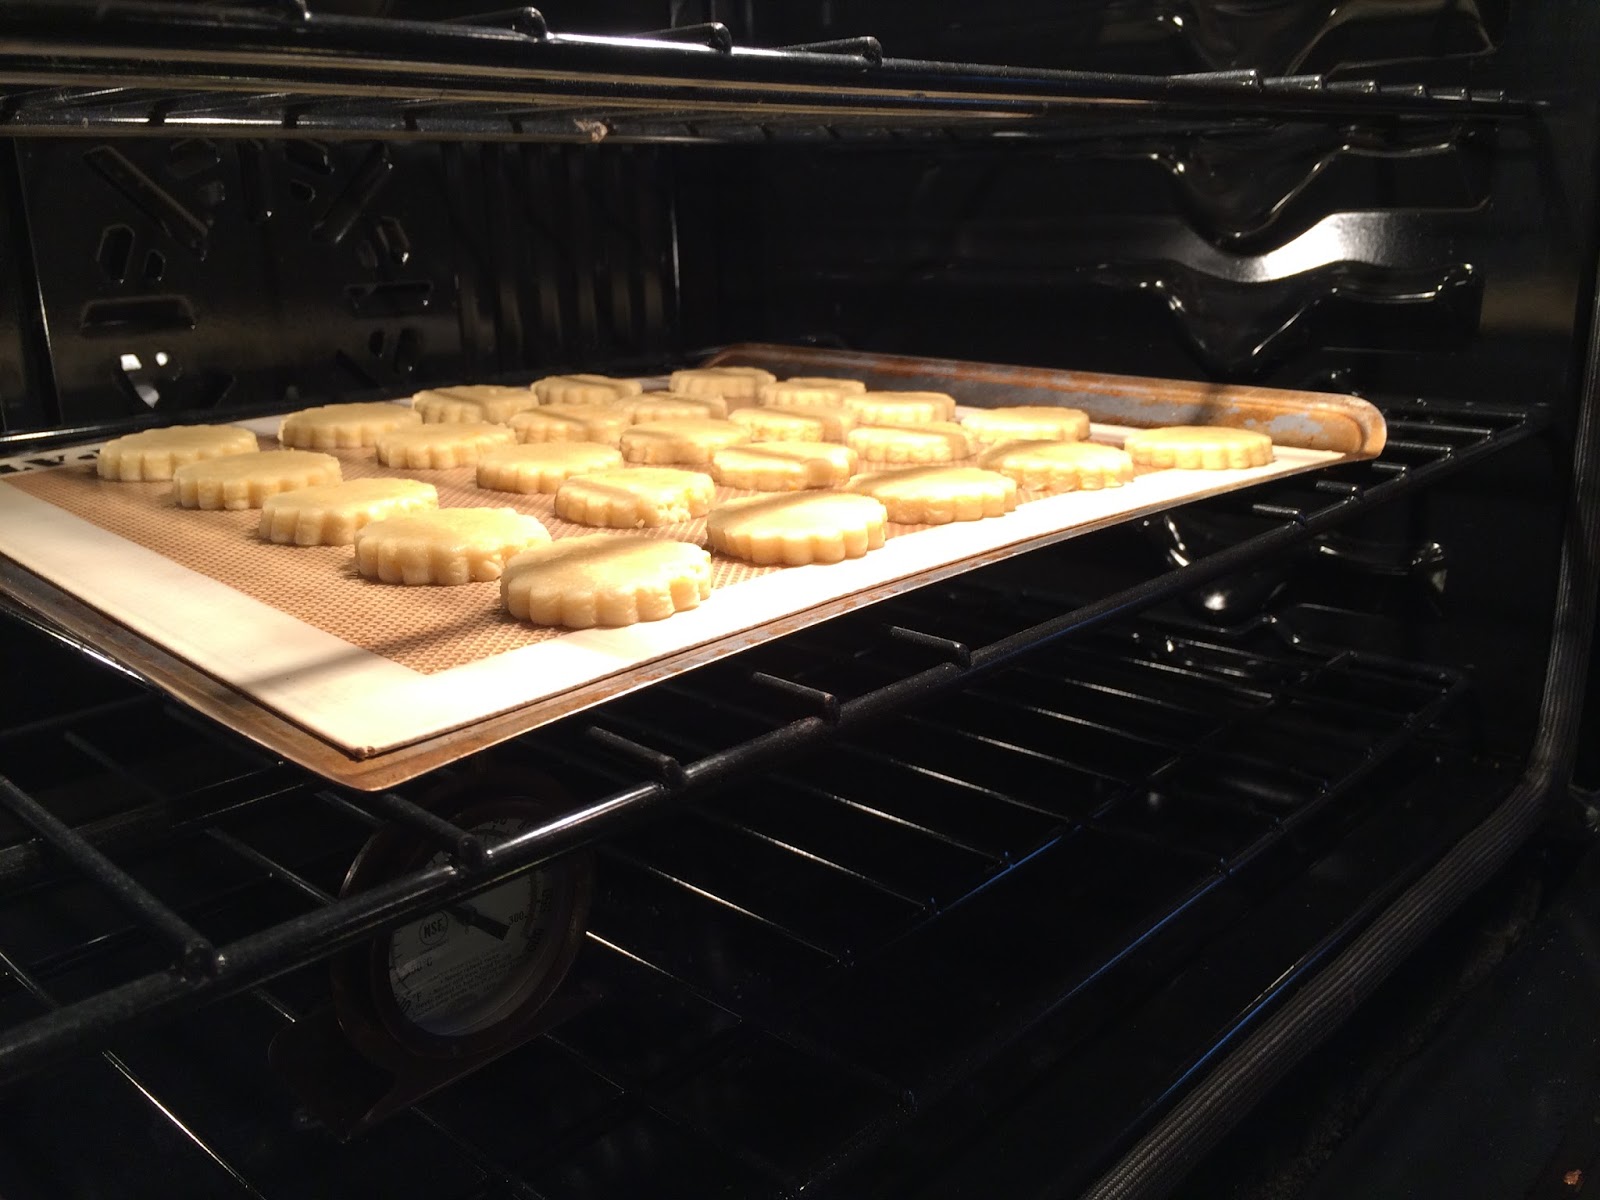
We used the small cookie cutters to make circles and placed them on the cookie sheets.


We put them into the oven to bake.


The finished cookies looked very lightly browned on the edges and not very different from those in the oven.


The cookies got a little hard in the container so I put a slice of bread in the container and they got softer and super tasty. We also made some with a simple glaze with powered sugar and orange juice that was tasty!!!


 I hope that you make these yummy cookies for yourself because I know that you will enjoy them.  I know that I will make them again soon!  Sorry it took me so long to post!!

Orange Lemon Cookies


2/3 c shortening 
1 1/4 c sugar
2 eggs
3 c flour
1 1/2 t salt
2 t baking powder
orange rind
1 T orange juice
1 t lemon juice

Cream sugar and shortening and eggs together until creamy.  Add dry ingredients to creamed mixture.  Add lemon juice, orange juice and rind to the dough.  Roll out to 1/4 inch think and cut into small cookies.  Bake for 350 degrees for 12-15 minutes.  Top with powdered sugar or glaze on top or eat plain.  If the cookies become hardened in the container then add a piece of bread to soften cookies.

Friday, July 22, 2016

Starbucks Chocolate Chip Cookie

This might sound a little strange but the only reason why I go to Starbucks is to take my son. Before you get up in arms about how horrible a mother I am, it isn't for the coffee.  We aren't a coffee drinking family and husband started getting gift cards at work for Starbucks.  I was a little upset that we were going to waste money and not use them so I decided to go and see if there was anything that I liked at Starbucks.  Although I do like the cinnamon chip scones and a few other baked goods, it is nothing compared to how much my son loves the Starbucks Chocolate Chip Cookie.

He will do anything to get this fun treat and I have gift cards to pay for this since they cost $2 each but they are totally worth it.  I decided to try to make it at home with a new recipe that I found.  Luckily I had all the ingredients on hand so I pulled them out and got ready.
 

I put the stick margarine and the coconut melt into the bowl.


I added the sugars to the bowl.


After the sugars were mixed, I added the eggs one at a time.


The dough got smooth.


I added the dry ingredients including the flour and the whole wheat flour.  Luckily I got a chance to use the remaining whole wheat flour from the freezer and enjoyed finishing off another item to clear out the freezer.


I chopped up the dark chocolate bar. First into bigger pieces and then into a little bit smaller pieces.  I am not a huge dark chocolate fan but it is a nice flavor to have in the cookies for a treat.  I got this one free at Harris Teeter and we are almost out of chocolate chips so it served a lot of purposes!


I added the chocolate chips and the chocolate bar to the cookie dough.

I thought it looked a little thin but I hate changing recipes the first time that I make them.  I scraped the sides of the bowl and got ready to scoop the make cookies.


I made the cookies with the scoop on to the silpat.


Unfortunately, they spread across the cookie sheet and didn't really maintain the shape.

After adding a little more flour, these cookies turned out really flat and not really like the cookies at Starbucks.  The similarity was found in the whole wheat flour which I thought added a nutty flavor that was pretty tasty.  My husband did not like it for the exact same reason.


So these cookies aren't going to be made again in our house but I would totally say that they needed more flour needed (at least 1/2 cup) so I added the additional flour to the recipe from the original recipe.  I hope that you try these out and see if your family would enjoy these cookies.  If you want to check out the original recipe, please look at the original recipe on the blog, The Grant Life here.


Starbucks Chocolate Chip Cookie

 
Ingredients
  • 2 sticks of unsalted butter, softened
  • 1 cup of sugar
  • 1 cup of brown sugar
  • 2 eggs
  • 1 teaspoon vanilla
  • 1 1/4 cup whole wheat flour
  • 1 1/4 cup all purpose flour
  • 1 teaspoon baking soda
  • 1 teaspoon baking powder
  • 1 cup dark chocolate chunks
  • 1 cup semi-sweet milk chocolate chips
Instructions
  1. Preheat oven to 350 degrees
  2. Cream the butter and the two sugars together until light and fluffy.
  3. Add in the vanilla and the eggs, one at a time.
  4. Mix together all the dry ingredients - both flours, baking soda and baking powder.
  5. Add the dry ingredients to the wet ingredients and mix well.
  6. Add in both chocolate chips and stir until combined.
  7. Drop ⅓ cup spoonfuls of dough on a silicone baking sheet and bake for 10-12 minutes, or until the edges are golden brown.
  8. Remove from oven and place on a wire rack to cool.

Tuesday, February 9, 2016

Cream Cheese Frosting

I decided that I would use the rest of the cream cheese from the freezer to make some frosting for my son's birthday cupcakes because I love cream cheese frosting. 

The great news is that I still had some of the Duncan Hines frosting flavors!!  I made Chocolate Almond, White Chocolate Raspberry and Mint Chocolate to flavor some of the icing for the decorate your own cupcakes at my son's party.  I think that I might have to try some of the flavoring in the cake next time!!  YUM!!


I put one block of cream cheese in the mixing bowl with two sticks of butter and mixed with the whisk attachment.


I added 3 cups of powdered sugar which seemed like a lot but mixed in very quickly.  Most of the recipes that I saw called for 4 cups but I started with 3 cups and I was happy.  I didn't add any vanilla because I thought the cream cheese flavor and the added flavor packets was going to be plenty.


I put the mixer on high and let it mix until combined.  There were still a few chunks and I wish that I let it go a little longer but it didn't look like it was making a big difference.


I scrapped the side of the bowl and made sure that it was all combined since some always sticks on the side of the bowl.


It was tasty by itself (per my mother who wanted to eat it with a spoon) but it was super yummy on the Bonnie Butter cupcakes that I made.  I decorate the cupcakes going to my son's school with yellow sugar sprinkles that he made and an M&M on top with the Lego colors for the birthday theme continued. 


For his birthday party, we put them in plastic sandwich bags and cut the corner to easily squeeze so the kids could pick the flavor and it made an easy piping bag without having to give each kid a knife even though I had them on back up if it didn't work.