Showing posts with label freezer meals. Show all posts

Wednesday, February 10, 2016

Enchilada Sauce Face Off Competition

I made my normal enchilada sauce to go head to head with another recipe that I found online.  I figured that was perfect for a snow day.  I pulled out the ingredients on the counter to make sure that I had everything.  I used the ground oregano but normally I use the regular stuff but I haven't had any recipes for the ground stuff so I decided that it was time to use it up.


I added the oil and flour to the pan and stirred together.


They mixed together to make a little paste.


I added the seasoning to the pot and stirred until it was really fragrant.  YUM!!


When it all cooked up was a thick paste that I pushed to the edge of the pot.


I measured the chicken broth from the broth that I just made which was super tasty.


When it was mixed, it looked pretty brown but still smelled great.


The other enchilada sauce recipe started with exactly the same other steps but then when I got to this step I added crushed tomatoes before the chicken broth. 


When the enchilada sauce was mixed, it was a little more red but still had a lot of brown.


I put them in containers in the fridge side by side for the test.


I put the sauce in the bottom of the pan and it shows you how different they are in color.


We had the enchiladas that night because my husband said it was torture to smell it all day and then not to get to eat them right away.  The two flavors were different and both good.  We decided that they would be good mixed together so I mixed the extras and put them in the freezer in individual serving sized bags for future use.


I hope that you try them and see what you like for you and your family!!

Red Chili Sauce


Ingredients:
  • 2 Tbsp. vegetable or canola oil
  • 2 Tbsp. all-purpose or gluten-free flour
  • 4 Tbsp. chili powder
  • 1/2 tsp. garlic powder
  • 1/2 tsp. salt
  • 1/4 tsp. cumin
  • 1/4 tsp. oregano
  • 2 cups chicken or vegetable stock
Directions:
Heat oil in a small saucepan over medium-high heat. Add flour and stir together over the heat for one minute. Stir in the remaining seasonings (chili powder through oregano). Then gradually add in the stock, whisking constantly to remove lumps. Reduce heat and simmer 10-15 minutes until thick.

Use immediately or refrigerate in an air-tight container for up to two weeks.


Enchilada Sauce


Ingredients:

  •  2 tbsp vegetable oil
  • 2 tbsp flour
  • 2 tbsp chili powder
  • 1/2 tsp cumin
  • 1/4 tsp cayenne pepper (optional which I don't use)
  • 1-2 cups water or chicken broth
  • 8 oz crushed tomatoes
  • 1 tsp garlic powder
  • 1/2 tsp onion powder
  • 1/2 tsp salt
Directions: 
Heat the oil, flour and chili powder together in a large pot. Allow to cook for a minute or two.
Add the remaining ingredients and bring to a slow simmer. Stir well to combine and dissolve tomato paste in water. Allow to cook for at least 20 minutes, stirring occasionally. Add more spices as desired.


  I hope that you enjoy these yummy and super frugal recipes to make your own enchilada sauce instead of spending the money on a can of enchilada sauce.  We enjoy the red sauce the best but mixing them was also tasty.  Which kind of sauce do you like?

Tuesday, July 15, 2014

Sausage Lasagna

I have been wanting to make lasagna for years and I have never done it.  I am not sure why it was one of the things on my list that I thought would be really hard to do.  Let me be the first to tell you that it is easy!  If you can make spaghetti, then you can make lasagna.

I started by pulling everything out of the freezer.  I cooked the sausage ahead of time and froze it until I had time to make everything.  I usually keep a few bags of cooked sausage in the freezer because they are great on pizza or to have on hand to throw into any meal.  I cook it in the pan and then towel the grease off and put it in a plastic bag to freeze.  If you lay it flat when you are freezing, then you can stack the frozen bags like books on a shelf to fit lots in the freezer and always have access.  I also had the fresh Mozzarella shredded and frozen in addition to the pre-shredded cheese.  I got my homemade sauce out to defrost too!


I put the frozen sausage and some of my homemade sauce that I made and froze awhile ago into a pot to simmer.  I added a little sugar, fennel, and oregano for additional flavor based on three or four different recipes that I was looking at online.  Do you see the frozen chunk in the middle?


I put 2 containers of ricotta in a bowl and added one egg.


I added the Parmesan cheese which took a lot of the container of cheese.


I stirred it together with the spatula and added some parsley for flavor and color.  I thought it looked pretty good.


I decided when I was at the store to try both the cook and the non-cook noddles to see if they were different to work with and if they tasted different.  We did a head to head comparison with two small casserole dishes and we found that they tasted very similar.


I started the bottom of the pan with the sauce.


I did the noodle layers.  Are you noticing that the pans are different?  I made four casseroles- two to eat for dinner that night and two to freeze so I had out a lot of pans which I was doing at the same time.


The next layer is spreading the cheese mixture on the noodles.  I think that if I was going to make lasagna all the time, I would probably use the non-cook noodles because they were easier to work with and held together better.  Plus, it was easier to spread the cheese on the harder surface and get a more even layer.


I topped each cheese layer with my sausage sauce again.


Then I repeated until the pan was full to the top.  I started and ended with sauce but the pattern was sauce, noodle, cheese and then start again.  It was great to make the layers and see how quickly the pan filled up.  I topped with shredded Mozzarella cheese and Parmesan cheese.

.


It was easy to bake and I put the pan in the oven while it was warming up so that the pan could come up to temperature gradually with the oven because I didn't have enough time to leave it on the counter to come up to room temperature before baking.  The two different casseroles cooked a little differently and the one had to be cooked longer.


It was great and we all enjoyed it!  I will make that again the next time I get a great deal on ricotta cheese.  It was super tasty and great for dinner and leftovers.  I hope that you try to make this for you and your family soon.


I am excited that I have two waiting in the freezer because they were great for dinner and I am going to enjoy having them for a quick and easy dinner in the coming months.  This was something on my list of things that I wanted to make and was always avoiding because I thought it was too hard.  I am no longer avoiding this because it was quick and easy!!  Hope you enjoy it too.

Sausage Lasagna


2 (15 oz) containers of Ricotta Cheese
1 egg
1/2 c Parmesan Cheese
1 tbsp parsley
Lasagna Noodles
Sauce
Cooked Sausage
1 tbsp sugar
Garlic
Basil
Fennel
Oregano
Mozzarella and Parmesan Cheese

Cook sausage and drain or use precooked sausage. Add spaghetti sauce to sausage and simmer for up to one hour to add sausage flavor to sauce.  Add sugar and season to taste with garlic, basil, fennel and oregano.  Simmer until ready to use.

In a medium sized bowl, mix 2 containers of ricotta cheese, 1 egg, 1/2 c Parmesan Cheese, and 1 tbsp of parsley in bowl and combine with spatula.

Cook lasagna noodles or use no cook noodles.  Put sauce in the bottom of the pan and spread.  Put noodles on top of the sauce.  Spread with cheese mixture.  Top with sauce and repeat.  When the pan is full, spread with shredded Mozzarella cheese and Parmesan cheese.

Spray the aluminum foil with non stick spray and cover pan.  Bake at 350 degree covered for 25 minutes.  Remove the aluminum foil and cook for another 25 minute or until cheese is browned.  Let the pan sit for at least 15 minutes before cutting.  Use spatula or pie server to get out of the pan to serve.

Thursday, February 27, 2014

Thifty Thursday: Things to Make to Freeze

Do you want to save time and money?  Do you want to cook more from scratch but don't think you have the time?  I have a few things that you can start with to save a lot of time and money easily.

I cheat by making ahead and keeping tasty food in the freezer so that we have things ready.  There are a few things that I like to make double batches or cook specifically to freeze.  There are a lot of time saving foods that I can't live without in the freezer.  I hope that these give you some ideas of things that you can do to save some time by making a little extra when you are already cooking so that you don't have to make the pots and pans dirty twice.  Save time and money!!

1.  Pancakes and Waffles-  My son loves pancakes and waffles and we used to buy the prepared ones which you can throw in the toaster or microwave for a quick breakfast.  Now I make a ton of them when we are eating them and put all of the extras in the freezer.  I lay them flat in a big plastic bag until frozen and then shake them down and add a few more if I have more to fit in.  These means that I use my homemade recipe and my son can have these healthy treats for breakfast, lunch or dinner.  Added benefit is that when you get a deal on eggs and milk or if they are near expiration, you can make a big batch of pancakes to freeze.  Here is my recipe for fluffy pancake mix and pancakes (I use the same for waffles) and here is my recipe for cinnamon roll pancakes.


2.  Rice-  I make mostly white rice because it takes only 20 minutes.  I would like to eat more brown rice but since it takes so much longer to cook, I often don't have the time to wait before getting dinner on the table.  I prefer this brown rice which is tasty and freezes really well but you can use lots of different brands.


 I make slider bags and stack them on top of each other until they are frozen and then I put them upright like books on a shelf.  I use the scale to help make them even but you can also just eye ball it to get mostly even bags.  We eat one serving and freeze the rest which are super easy to microwave whenever you want rice.  They are easy to use just like the Ready Rice in the pouches.


3. Enchilada Sauce-  I make my enchilada sauce from scratch now instead of buying the canned sauce.  It is really easy and uses items that are commonly already in the your pantry (recipe found here).  It can be done on a weekend or night when you have a little extra time.


I make a big batch which I use to make dinner and freeze the extras.  I make them flat in plastic bags and when they are fully frozen, I get to put them upright in the freezer so they are easy to grab when you need them.  I like to divide in the amount that I use them in so it took a few times to have the right amount.  If there is extra seasoned chicken, it is also great to freeze because you can make a full meal with these two bags straight from the freezer.


4. Shredded and Sliced Chicken-  I make the seasoning chicken up above and I also like to boil bone in chicken until it is cooked and remove it from the bone to do different styles like shredded, cubed and sliced chicken. 


I make individual bags to use for different recipes.  I make Buffalo Chicken sliders, Sloppy Chicken Joes, Rosemary Garlic Chicken Pizza, Chicken Tortilla Soup and Chicken Enchiladas.  They are also used for paninis and other recipes that cooked chicken is helpful in.  It is easy to take off the bone and shred with forks or cube or slice chicken.  Save the bones and put them back in to the water with veggies and seasonings to make broth too!


5.  Cooked Sausage-  I get the ground sausage and cook it up in one big batch.  I put it all in a plastic bag so that I have it to put on top of pizza or use in stuffing, Cheesy Garlic Pizza Bites (recipe found here).  It is great to have it available and already cooked (and degreased) so that it is ready to use.


6. Cooked Ground Beef- I cook meat to make for dinner that night and cook a little extra and set it aside.  I make sure to get all of the grease out so that it doesn't leave a lot of grease in the bag that I freeze it in.  It is great to use for Hamburger Helper, Tacos, Salsa Sloppy Joes or French Dip Sloppy Joes, and more.


7.  Buns- I love making fresh bread because it tastes so much better then store bought but these buns are my favorite.  I made whole wheat ones which are good (recipe found here).


Then, I tried another recipe and I won't ever need to try another because we love them and they freeze wonderfully.  I put them in a bag and when they get more solid, you can smoosh them together more to fit in the freezer.  I normally get around 16 buns from the recipe because I don't make them super big (recipe found here).


8.  Diced Ham- I get the ham steaks when I can get them free with coupon and I dice the ham and put one of two into a plastic bag and freeze.  I can pull out a few pieces to use in fried rice and other meals right out of the freezer.


I used to make the dice big so that they wouldn't stick together but I don't think that it makes a big difference so now I cut them smaller.  I can fit more into the bag and I am able to use them a little bit more for flavor.


The first step is to make these easy foods and get them into your freezer and the second step is to start using them to save you time and money.  Stock up when things are on sale cheap and freeze them to use when you need them.  Do you have anything that you like to make to freeze? Do you think that you might start now?  I hope that some of these recipes help you figure out some great things that your family would like to try.

Friday, November 2, 2012

Philly Cheesteak Sloppy Joes (or maybe french dip)

I found a recipe online at a new blog for Philly Cheesesteak Sloppy Joes which I thought was really interesting so I added it to my list of things that I wanted to make when I got a chance.  I decided to put sloppy joes on the menu and aim for making these but have the back up of the regular sloppy joes.  Super excited that I had enough energy after the morning at the dentist to make these for dinner.  I didn't follow the recipe exactly as it was written but I changed it to what we had in the house and what we liked to eat because we don't like onions and peppers so check out ours and the original recipe below or by clicking on this link.

First, cook the ground beef in a skillet.  I use a paper towel to clean up the grease from the pan.  I like to get my ground beef really dry so I usually use the spoon with the paper towel on it to press on the meat.  I think that it might be a little overkill for others but I wonder how other people get the grease out of their ground beef??


While the meat was cooking, I grated the cheese.  I decided that I wasn't going to make the cheese sauce but rather shred Monterrey Jack cheese and melt it with the hot meat.  My husband loves cheese but he is never a fan of cheese sauces and I figured that I would save the effort :)


I cut my homemade rolls that I had made the day before and put a little cheese on the bottom of the roll.  Who says that it all has to be on the top??


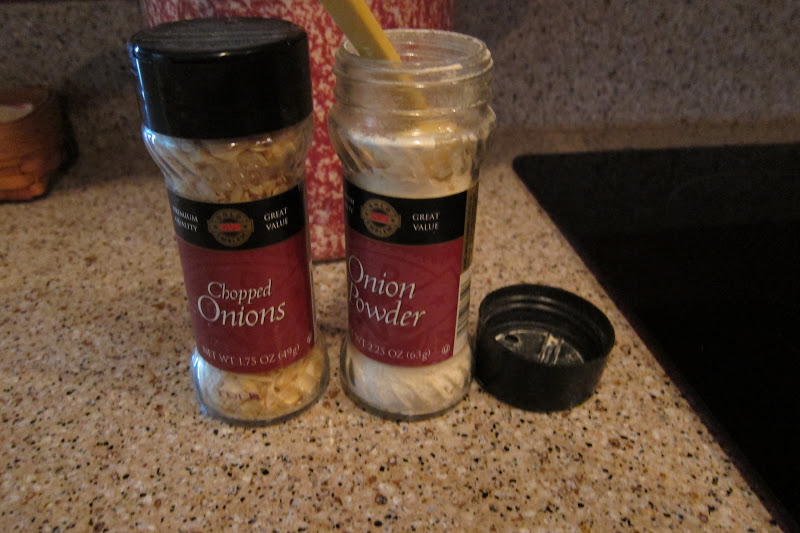
I didn't have beef broth in a can or carton so I made it with beef bouillon in the package.  I mixed the amount with 1 cup of water... and then add a little extra because the recipe called for more salt so I figured that it was better to add a little more beefy flavor.  I pulled out the onion powder and chopped onions from the cupboard.  I thought the chopped onion was too big so I actually got out the cutting board and minced it :)


I added the beef broth, 1/2 tsp minced onions, and 2 tsp onion powder to the skillet with the beef.  Then, I added the steak sauce.  It was only supposed to be 2 tbsps but I know that I got more than that because I thought it was going to be thicker than it was so it came running out before I could..oops but things happen right?  It looked really soupy but it bubbled and simmered while we did other things to get ready for dinner and it was warm and ready when we were.


I put the meat on the roll and topped with more cheese.  It melted quickly and it was really tasty!!


My husband and I really love them but we both agreed that it tasted more like French Dip (which we both love and haven't had in ages).  So check out the recipe and see if you think that it tastes like Cheesesteak or French Dip because it might be the changes that I have made which have changed the taste but it was wonderful!!  We will be having this again soon and might have to add it to the regular menu list!!  The modified recipe is listed below but feel free to check out the original here.


Philly Cheesesteak or French Dip Sloppy Joes


1 pound ground beef
2 tablespoons steak sauce (or Worcestershire or both)
1 cup beef stock (or warm water with beef bouillon dissolved)

2 tsp onion powder

1/2 tsp minced onion
Ground black pepper
4 dinner rolls
1 cup shredded cheese or cheese sauce

In large skillet over medium-high heat, brown the ground beef.  Add beef stock, steak seasoning, onion powder, minced onion, and pepper.  Can salt to taste but I thought that the beef bouillon added enough salt for the dish.  Bring up to a bubble and cook about 2 minutes (or until you are ready for dinner).  If you want to thicken, mix a little of the stock with flour until combined and add to the sauce.

To serve, place a scoopful of the meat mixture onto the bottom of the rolls, then top with the cheese or cheese sauce and replace the top of the roll. 


**Note:  I made them with the au jus packet from the store once and they were also good.  I cook ground beef and keep in the freezer so that I can throw it into the sauce to have a quick meal.  I made a cheese sauce one night with mozzarella cheese which was super tasty.  It is a great way to stretch your cheese.  It is great with a soft roll but you can butter and heat up in a pan so that it is fancy like a restaurant.

Tuesday, September 25, 2012

Salsa Sloppy Joes

Tonight on the menu was Salsa Sloppy Joes with homemade buns.  I have tried so many sloppy joe recipes and my husband likes one and I don't... then I try another which I love and he hates.  I found this one on a blog and I thought that it was probably a loser like the rest but worth the try.  This one did not disappoint!  We both loved them.  There was a lot of flavor and sauce without being overpowering.  The best part is that it was super easy to make.

First, I made the ground beef and used paper towels to get out all the grease. 


Then I got out all the other ingredients- tomato soup, salsa and brown sugar (originally) and then most of the other times I made it with tomato paste mixed with water or tomato sauce.


I poured the salsa in the tomato soup... My family likes the flavor of salsa but not the texture so I blended it in a blender before it was time to make dinner and had it in the fridge.  It is very yummy if you have never tried it to eat with chips and salsa or in salsa sloppy joes!!!


I must admit, I lost a little confidence because it looked a little gross with the tomato soup but I thought it was much better with the tomato paste.  I might have also thought it said one jar of salsa and not one cup so there was a little more salsa in there then called for in the recipe the first time.


Brown sugar came next.  Look, I made a face without even meaning too :)


Stir it all together and you have... SLOPPY JOES!


I wish I had taken a picture of my plate but we had company and it is a little weird to pull out the camera at the table and take pictures of every one's plates... right?  We topped with some sliced mozzarella which got super melty.  We all ate and enjoyed and wish we had room for seconds.  They were great on the homemade buns (pictured below).


I hope that you try this recipe with your family!!  Let me know what you think about it.  Check out the recipe below and the original post from Eat Cake for Dinner (or in this case Sloppy Joes).

Update:  I have made this recipe lots of times since this and not made a special trip to the store to get tomato soup because that is not something we keep in our pantry.  I use tomato paste and add water first and stir.  Then, I add in the blended salsa and stir in water until it is a good consistency.  A lot of the water will cook off but it helps the tomato paste mix out.  After it is combined, I add the brown sugar.  I have also used tomato sauce and that worked out well too.  This is a great recipe to use whatever you have around the house but I highly recommend trying it.  Great to make ahead and freeze!!!

Salsa Sloppy Joes

1 lb ground beef
1 c salsa
Tomato sauce or tomato paste with water (or 1 can (10 3/4 oz) condensed tomato soup)
1 1/2- 2 tbsp brown sugar
Hamburger buns

Brown meat in a skillet over medium heat.  Add the salsa, tomato product and brown sugar.  Stir well to combine.  Simmer for 10 minutes (or until it is time for dinner).  Serve on hamburger buns.

***Note: I make these a lot and don't use tomato soup anymore but I use tomato paste and water or tomato sauce (unflavored) depending on what is on hand.  Great to make a double batch and freeze the leftovers.  Also good served over baked potato for something different for lunch the next day!