Showing posts with label Snack. Show all posts

Tuesday, October 24, 2017

Mozzarella Sticks

Mozzarella Sticks are one of my husbands favorite treats at restaurants.  We love to try different kinds and they tend to be one of those things that we both enjoy.  I had some cheese sticks that we hadn't eaten and I decided that I would make some Mozzarella Cheese Sticks at home for a nice treat with dinner.


First, I coated the cheese in flour to better help the egg mixture to stick to it.


Dip flour coated cheese in egg mixed with water until a good consistency.


Cover in breadcrumbs to totally coat.


Roll around and press into the breadcrumbs.


Coat in the egg mixture again.


Coat with second helping of breadcrumbs to make sure fully coated.


Add to hot oil and cook until golden brown.


They come out nice and crispy!! Make sure to let them lay on a paper towel to help them not be greasy.


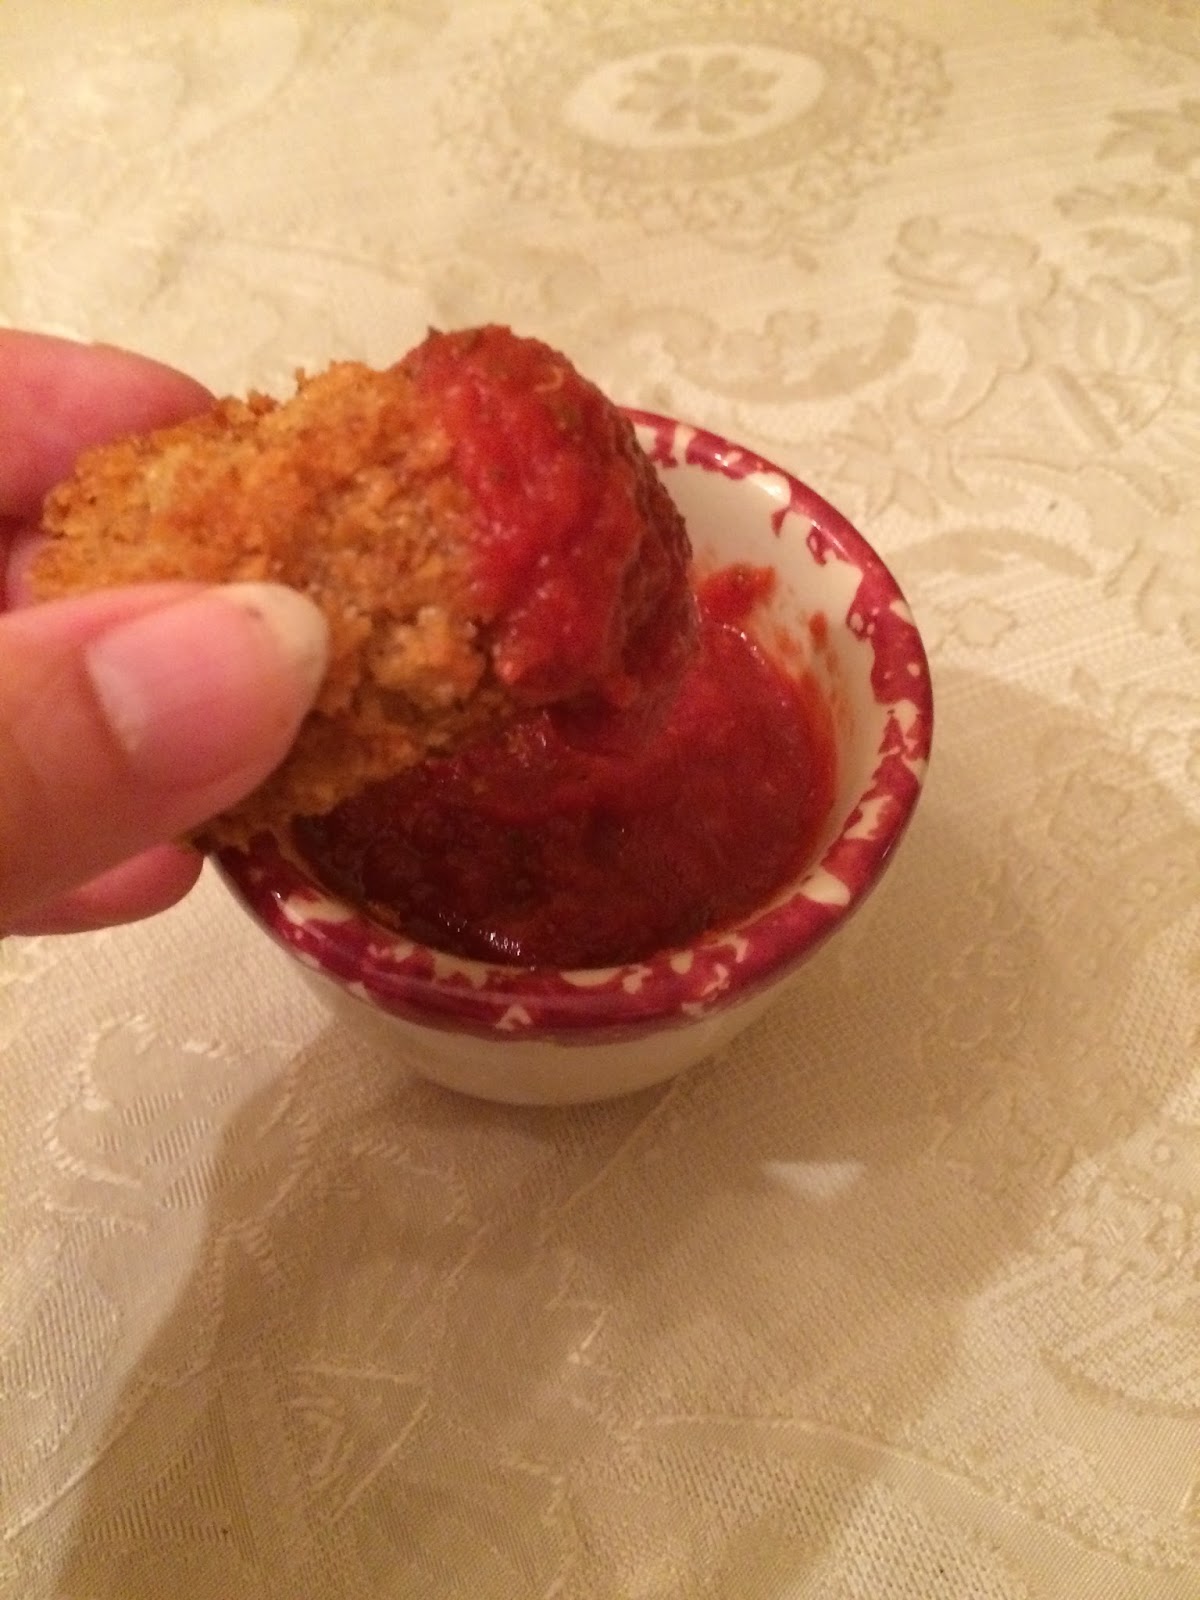
They are amazing with a little dipping sauce!  Tasted just like the restaurant ones and we enjoyed them with our meal.


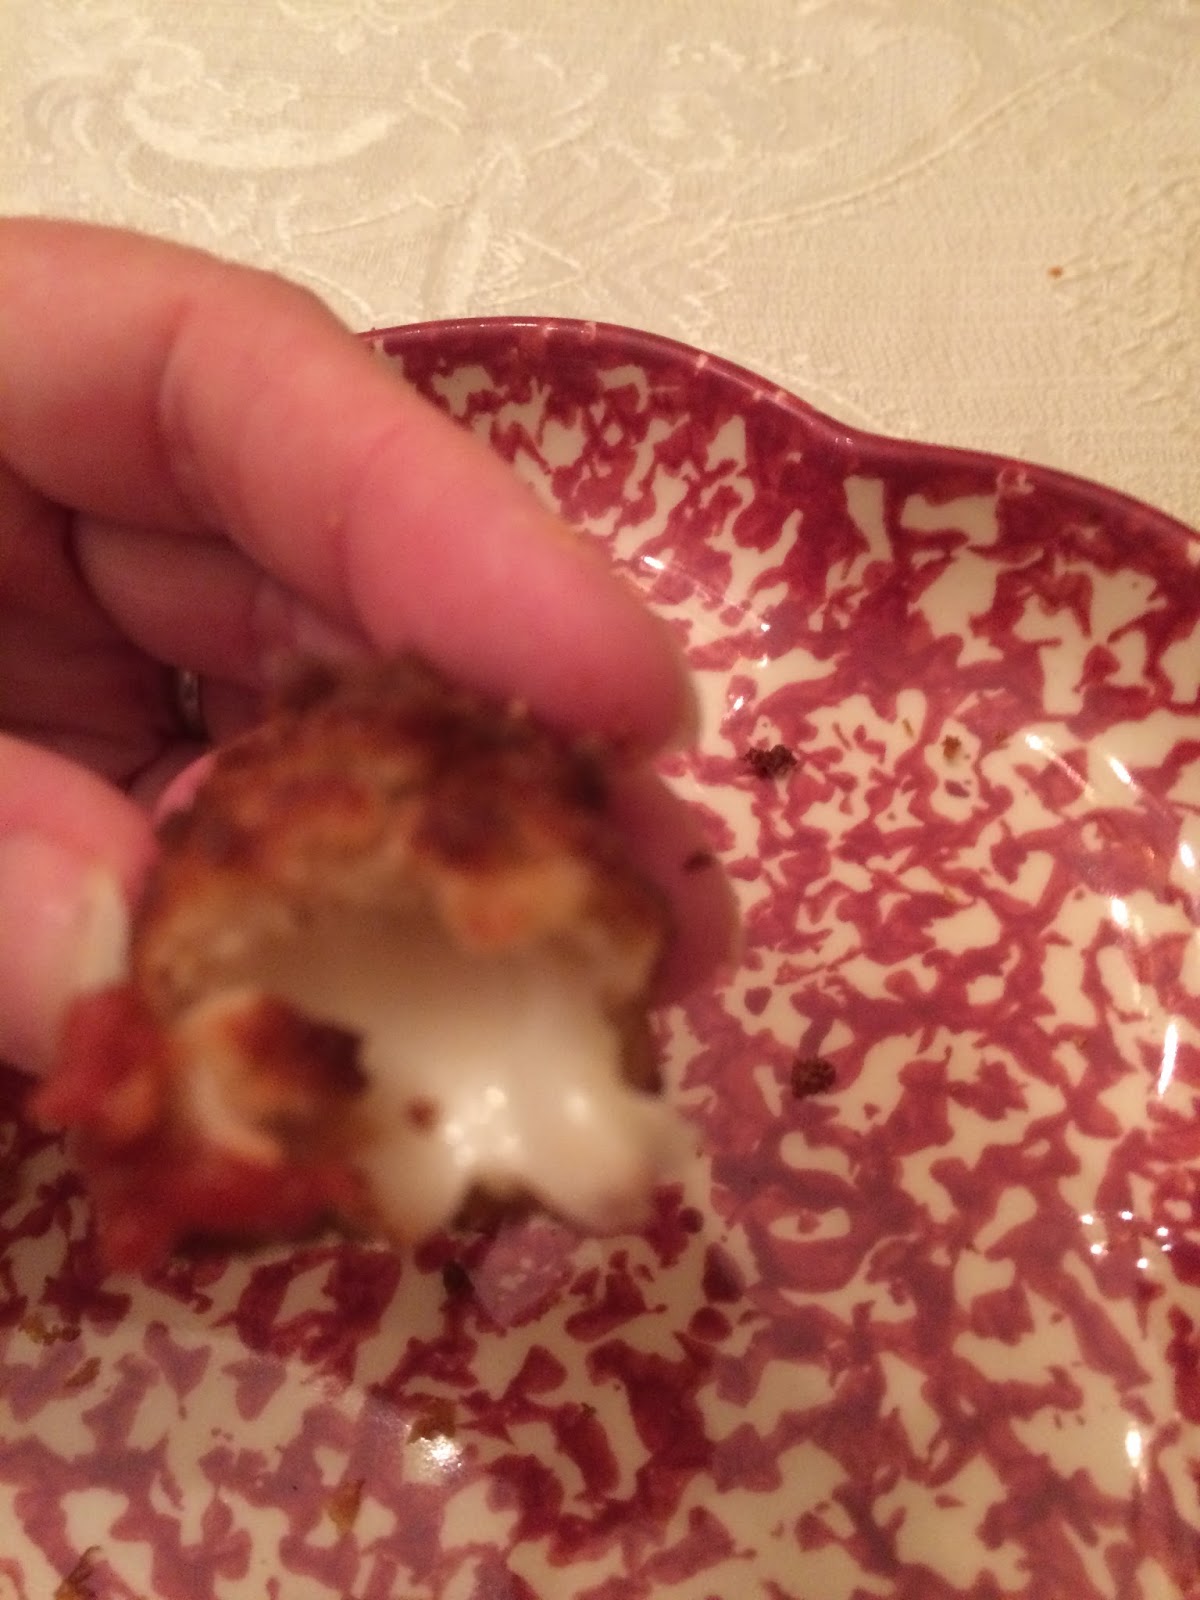
It was hard to get a picture of the inside with the melty cheese but it was stretchy and amazingly creamy with the crispy exterior.


We had a whole plate but they were quickly eaten and I realized that I needed to take another picture but I only had one left.  I love when I can make restaurant favorites at home with little or no cost.  It uses spaghetti or pizza sauce that I was already making, breadcrumbs that I made from stale bread and cheese that we had extra on hand.  I was sad that we used up all the cheese and I am going to try it again with a block of cheese instead of string cheese and see what the difference are going to be.


I hope that you try these too! I will totally make these again and again and again!  I want them tonight after looking at these tasty pictures.

Thursday, October 8, 2015

Seasoned Saltine Crackers from the Pioneer Woman

My son is really into the Food Network app so we have been watching a lot of cooking shows.  We have not had cable in about 14 years so I normally don't get to watch those shows unless they are on local channels of PBS (America's Test Kitchen).  For those of you who don't know about it, let me tell you that it is amazing (although a little glitchy) because you can watch live shows or pick a show to watch.  One night my son picked Pioneer Woman and we watched her make Seasoned Saltine Crackers and it has been on my mind ever since.


We were getting close to the end of the month and running out of snack food so I decided to turn the remaining saltine crackers into these buttery good snacks.  I was super excited because I had all the ingredients on hand and I was ready to make them.  I pulled out the ingredients and I was on my way!


I heated up one stick of margarine with 6-8 tablespoons of the coconut oil Melt to add a little different flavor.  I added the seasoned salt and Italian mixed seasonings to the melting butter.


I put two crackers into the butter and mixed them around.  There was so much butter that I thought that I was going to be able to do crackers forever but it did start to dry up.  There was still seasoning in the pan and I had a few more crackers so I put a little more butter in the edge to cover the last few crackers with the wonderful seasoning.


I flipped the crackers and coated both sides before moving them to the sheet pan that I have with a cooling rack fitted inside it so that the butter can drain and the crackers can cook on both sides.  If you don't have anything like this then I would think that you could use the broiler pan that has two levels or else flip the crackers halfway through cooking.


I preheated the oven to 275 degrees and baked them for 20 minutes.  They were cooking up nicely and I didn't have any problem with burning or over browning.


They came out looking golden and beautiful.


I put them in a container and they were ready to store after I taste tested a few of them.


These tasty treats are easy and fun and would dress up any boring cracker to be a tasty treat.  I am going to be trying this with all of our crackers eventually!!!


Seasoned Buttery Crackers

  • 2 sticks margarine or butter
  • 1 teaspoon Italian Seasoning
  • 1/2 teaspoon Seasoned Salt
  • 1-2 sleeves Saltine Crackers

Preheat the oven to 275 degrees F.

Melt the butter in a saucepan and add the Italian seasoning and seasoned salt. Dunk the saltines in the mixture covering both sides and place on a rack over a baking sheet. Bake for about 20 minutes.Watch to make sure that they don't over brown or burn.

Saturday, April 12, 2014

Nacho Cheese or Parmesan Garlic Oyster Crackers with Kernel's Seasonings

I bought some oyster crackers at Aldi's with the intention of making these yummy cheese crackers but we ate the whole bag before I even got to make them.  So this time I bought two bags of oyster crackers knowing that it might take a little more to get them made.  I got out all the ingredients to make sure that I had enough of everything else.


I poured the oil and a cap full of kernel seasonings in the plastic container over the oyster crackers.


I put the top on the container and gave it a good shake.  I added a little extra of the seasoning to cover the oyster crackers because I didn't think that they were coated enough.  I think that I ended up using half of the container when it was all done.  I spread the crackers on the baking sheet.


I baked them for 5-10 minutes and then took them out to cool.  They were easily poured into a container for storage and the powder cooked on to the crackers so that there wasn't a mess.  Some were coated more then others but they all looked yummy.


They were really tasty but with the extra seasoning that I put on them, they were a little salty.  I decided that they were so easy and the containers were already dirty so I made a batch of Parmesan garlic crackers (which were my husband's favorite).  I used the Parmesan garlic seasoning and followed all the steps with my second bag of oyster crackers....good thing I got two bags right?


I loved them!!  Both flavors were great and I can't wait to try white cheddar and some of the other flavors that I picked up on clearance at Bed, Bath and Beyond with a gift card ages ago.

These crackers would make the perfect addition to soup or a great snack. I hope that you try out this recipe for yourself to make a tasty treat, especially hot out of the oven.  We thought the nacho cheese tasted like popcorn seasoning and the Parmesan Garlic tasted like the white Cheese Its.  We enjoyed them all and they were a tasty treat at $0.89 per flavor.  I can't wait to mix flavors and see if I can get something else fun!!


Nacho Cheese or Parmesan Garlic 
Oyster Crackers

Ingredients:
·        1 bag of Oyster crackers
·        ¼ cup vegetable oil, to coat
·        1 cap full of Kernel Season’s Nacho (or any season’s flavor)

Directions:
Place all ingredients in a large container and shake lightly to coat crackers.   Bake on a non-stick cookie sheet at 325 F for 5-10 minutes until toasted.

Tuesday, March 11, 2014

Red Hot Cinnamon Glazed Popcorn

I saw this recipe and I knew that I had to make it.  Juggling Act Mama has a lot of great recipes but this one called to me immediately.  Who can resist cinnamon flavored anything?

We had some leftover red hots in the cupboard and we had a snow day so it seemed like fate because I had the time to make it.  It needed a whole cup of red hots so I was a little worried but we had them!


The first step was to make the popcorn on the stove top.  I heated up 2 tablespoons of oil in the pot and put in my few test kernels.


 When they popped, I put 1/3 cup of kernels in and shook them around.  I got a big pot of popcorn.


Then, I poured them in a bowl and made a second batch.


At this point my son came running because he wanted some of "his popcorn".  His has salt on it that goes in the pot with the popcorn and I didn't make any yet so I told him to wait just a little bit.  At the same time I was also melting the red hots on the other burner so I added the water and red hots into the pot and kept them a little low because I was making the popcorn at the same time.


Over a little bit of time, they melted down and I had this slightly goopy mess.


Since the popcorn was popped, I turned up the heat and continued to melt the red hots down.  They turned into a clear liquid which I may or may not of splashed on the stove...oops!


 I measured 12 cups of the popcorn into a big plastic container.  The original recipe called for putting it in a paper bag and I didn't have one so I was looking around the kitchen for alternates.  I used the cake holder and it was plenty big enough to give everything a swish in the container.  I poured half of the red hot mixture on the popcorn.  I was afraid it was going to shrivel the popcorn but it didn't at all.


I put the top on and swished it around.  The popcorn was totally covered when I opened it up.


I added some more popcorn and then topped it with the rest of the red hot mixture.  Closed the top and swish it again which covered all of the popcorn again.  I probably should have even more popcorn but I didn't want to mess it up.  I spread it on to two cookie sheets with silpats.


I baked and brought them out of the oven to stir.  I put them back and baked for the rest of the time.  The container still had a little bit of the red hot mixture in the container but it was easy to clean out the container.


 I took the popcorn out of the oven to cool.  The popcorn candy coating got hard and baked to a mostly solid coating.  With a little bit of drying, it was nice and crispy.


It looked like fancy store bought popcorn so I was pretty excited.  We ate so much of it off of the cookie sheets that we only needed a small bowl to store it.  If you would like, you can toss with additional red hots but we didn't want the strange texture different.  We ate it plain and it was wonderful!!  With the added benefit that it was not as hot as the red hots usually are.


If you would like to make your own, check out this recipe because it is easy and yummy.

Red Hot Cinnamon Glazed Popcorn

12-16 cups popped popcorn
1 cup of red hot cinnamon candy
1/2 cup of water
4-6 tbsp oil


Preheat the oven to 250 degrees.  Line two large baking sheets with silpat (or parchment paper). 
In a small saucepan, combine water and candies. Bring to a boil, stirring often until the candy melts.
In a large pot, heat 2 tbsps of oil of medium-high heat and add three kernels of popcorn to the oil and cover.  Wait until the kernels have popped and add 1/3 cup of popcorn kernels.  Swish the pot around on the stove so that the kernels aren't sitting in the same place to long or they may burn.  When the popping stops, pour the popcorn in a bowl.  Add 2 tbsps of oil and three kernels to make a second batch.  I should make 12 cups but in case it doesn't, make sure to follow the same process and make another batch.  On the second and third batch, you might have to lower the temperature of the burner so that the popcorn has enough time to cook.
Measure 12 cups of popcorn into a large plastic bowl that has a cover. Pour half the red hot mixture over the popcorn and shake.  Add additional popcorn if fully covered and then pour the remaining liquid and shake vigorously. 
Pour the popcorn out onto the silpat baking sheets. Be very careful with this step as the melted candy if very hot.  
Bake the popcorn for 10 minutes, then stir.  Bake for another 10-15 minutes until it’s almost dry.  Let cool and store in a sealed container.

Saturday, March 30, 2013

Cheesy Garlic Pizza Bites

I saw this recipe awhile ago and saved it because it looked like the perfect last minute dinner!  I love all the recipes at Mommy Hates Cooking so I was sure that I was going to love this one as well!!  I was planning on making some oven fried zucchini, tater tots, sweet potato fries, chicken crescent rolls and some other snack type foods so that we could sit down and watch a movie and eat our neat snacks.  The plan didn't work out that way because we didn't get to start dinner early enough and we were all kind of full from a busy day of snacking but I really hope to do it next time!!

I got out everything that I needed to make the cheesy garlic pizza bites per the recipe.


I started with the biscuit mix because I knew that I didn't have a lot left and I was thinking that I might have to cut the recipe in half but I had just enough to make the recipe so it was fate!!  I love my homemade biscuit mix so much because it makes the biscuits so light and fluffy but it takes powdered milk and that isn't something that I normally keep at home so I am going to have to try another recipe soon to see if it will be as good as my previous recipe.


Then, I started cutting the pepperoni into really small pieces.  I cut them in quarters and then three or four times more to make them really little because I figured that it would spread the flavor out more through the biscuits.


The original recipe called for Colby Jack cheese but we didn't have any so we went with the cheddar cheese because we had lots of that from the previous sale at Harris Teeter where I stocked up.


I added the cheese and pepperoni to the bowl with the baking mix and a stroke of inspiration struck!  I just cooked some sausage that morning which was still in the refrigerator.  I added a 1/4 of pepperoni and 1/4 of sausage to the biscuit mix.  Then, I added the water and mixed it all together.  I love cooking large amounts of sausage and throwing it in the freezer because it perfect for these type of recipes where you wouldn't normally add it because it is too much hassle to cook it first but when you do all the work upfront, you just pull a little bit out of the freezer and you are good to go!!


When it was mixed,  it made a nice dough which wasn't too watery or too thick.  Normally, I need to add a little more biscuit mix or water because it never turns out so perfectly but this was great.  It all came together in a big ball.


I measured the butter into the measuring cup and melted it in the microwave (so happy to have a microwave and not have to do it on the stove).  I know that sounds super lazy but it is really much nicer to throw the container in the dishwasher and not have another pot to wash!!


I measured out the spices to add to the butter mixture.


I spooned the dough into small balls on the greased cookie sheet.  Then I coated the top of the biscuits with a little of the seasoned butter with a small pastry brush.


I baked them for a little over 15 minutes until they were browned.  When I took them out, I brushed the top with some more of the butter mixture.


I put them all on a serving plate and we sat down to dip them in some yummy sausage sauce that was leftover from dinner the other night!!!  Perfect use for the leftover sauce instead of opening a new one :)


Check them out up close!  Doesn't it make you want to taste them??  They were light and fluffy and super flavorful.  I wanted to eat them all so quickly but I tried to take my time and share with everyone else.  They made lots of extra and I was thinking about freezing them so that we could enjoy them at another time as a snack or lunch. 


These would be great for a snack or a meal and super easy to pull together.  I wish that I had more biscuit mix because I would make some and freeze them for later.  They would be perfect for a batch of freezer cooking.  I hope that you check out the original recipe and try some yourself!!

Cheesy Garlic Pizza Bites


 Pizza Bites:
·                         4 Cups Regular Baking Mix or Gluten Free Baking Mix (see link in post)
·                         1/2 Cup Shredded Cheddar Cheese
·                         1/2 Cup Pepperoni (cut into small size pieces) and 1/2 cup ground sausage
·                         1 1/3 Cup Water
          
Glaze:
·                         1/2 Cup Melted Butter
·                         1 Tsp Garlic Powder
·                         1/4 Tsp Salt
·                         1/8 Tsp Onion Powder
·                         1/8 Tsp Dried Parsley
Directions:
Preheat oven to 375 degrees.
In a mixing bowl, combine the baking mix, cheese, pepperoni, and water. Mix this well until the dough has formed.
Spray a baking sheet with non stick spray. Then, drop tablespoonfuls of dough onto the greased pan about 2 inches apart.

Combine all glaze ingredients. Brush with butter topping on the biscuits.

Bake these in the oven for 15-20 minutes (based on size).
Note- If you are doing gluten free, these take about 20 minutes to bake, check to be sure they are done inside by using a toothpick and testing to see if any dough comes out on the toothpick.
As soon as they come out of the oven, top each one with a small amount of butter glaze.
Serve with pizza sauce for dipping.