Friday, October 17, 2014

The Missing Book Review

I started the second book, The Missing (Seasons of Grace, Book 2) by Beverly Lewis, directly after finishing the first because it ended with so many questions and I wanted to see where the story was going...and to be totally honest, I also picked up the third book in the series.  It is a great series so make sure you have all three books before starting unless you are way more patient then me!!!


Twenty-one year old Grace Byler longs to find her missing mother and to uncover the secret that drove her to leave them three weeks before. Grace suspects the reason has to do with her father and his reserved, uncommunicative ways. After long and hard though, Grace broke off her betrothal to her quiet, staid beau because she was afraid of ending up with the same relationship as her mother and father and now she will remain single forever. But when the young Amishman she thought was courting her best friend takes a sudden interest in her, Grace is befuddled and wonders if he can be trusted.  "Englisher" Heather Nelson has come to Amish country to relive fond memories of her mother and to contemplate a grave medical prognosis of her own. While in Bird in Hand, Heather meets Grace and the two young women strike up a fast friendship, amazed by how well they click. Following the only clue they have, Grace and Heather travel together in hopes of finding Grace's mother and bringing her home. You have to pick up the book to find out what they find when they travel to Ohio in search of Grace's mother.

I know that you won't be disappointed in this book or this series.  It is a great written book with great characters that you can't wait to find out what happens next.  I often found myself lost in their problems and wanting to pick up the book to find out what happens next.  It is also hard to put down so that means that you have to make sure you are caught up on all the other things around the house that you need to do because time passes quickly while reading this book.  I hope that you pick this up if it sounds interesting to you.  It is a great story of friendship and family in the Amish community (with a little outside in the English world).  I hope that you pick this up at your local library or bookstore and check it out for yourself.

Tuesday, October 14, 2014

Pumpkin Cinnamon Swirl Yeast Bread

Are you thinking about Halloween yet?  Well, I am and I started really early digging into the pumpkin recipes.  I made some pumpkin quick bread and I wanted something a little different.  When I saw this idea with more details here (who got her's from this recipe), I was sold.  I had all the ingredients that I needed in the house so it was perfect!  I pulled them all out to double check.


I measured out the pumpkin which is the hardest step.  I was using the last of the can which I had already made quick bread from so there wasn't enough and I quickly thought that I had some homemade pumpkin puree frozen.  I promise that this recipe is super easy and you don't have to use pumpkin puree but I wanted to explain why mine is two different colors.


I put the pumpkin in the bread machine first.


Then I added oil and water. 


Added the milk.


Then added the egg and stirred everything around so that I didn't have to mix up the egg before I put it in.  I added the seasonings and the brown sugar.


Add the flour to the top and then flatten it out a little to make sure all the good stuff underneath is covered.


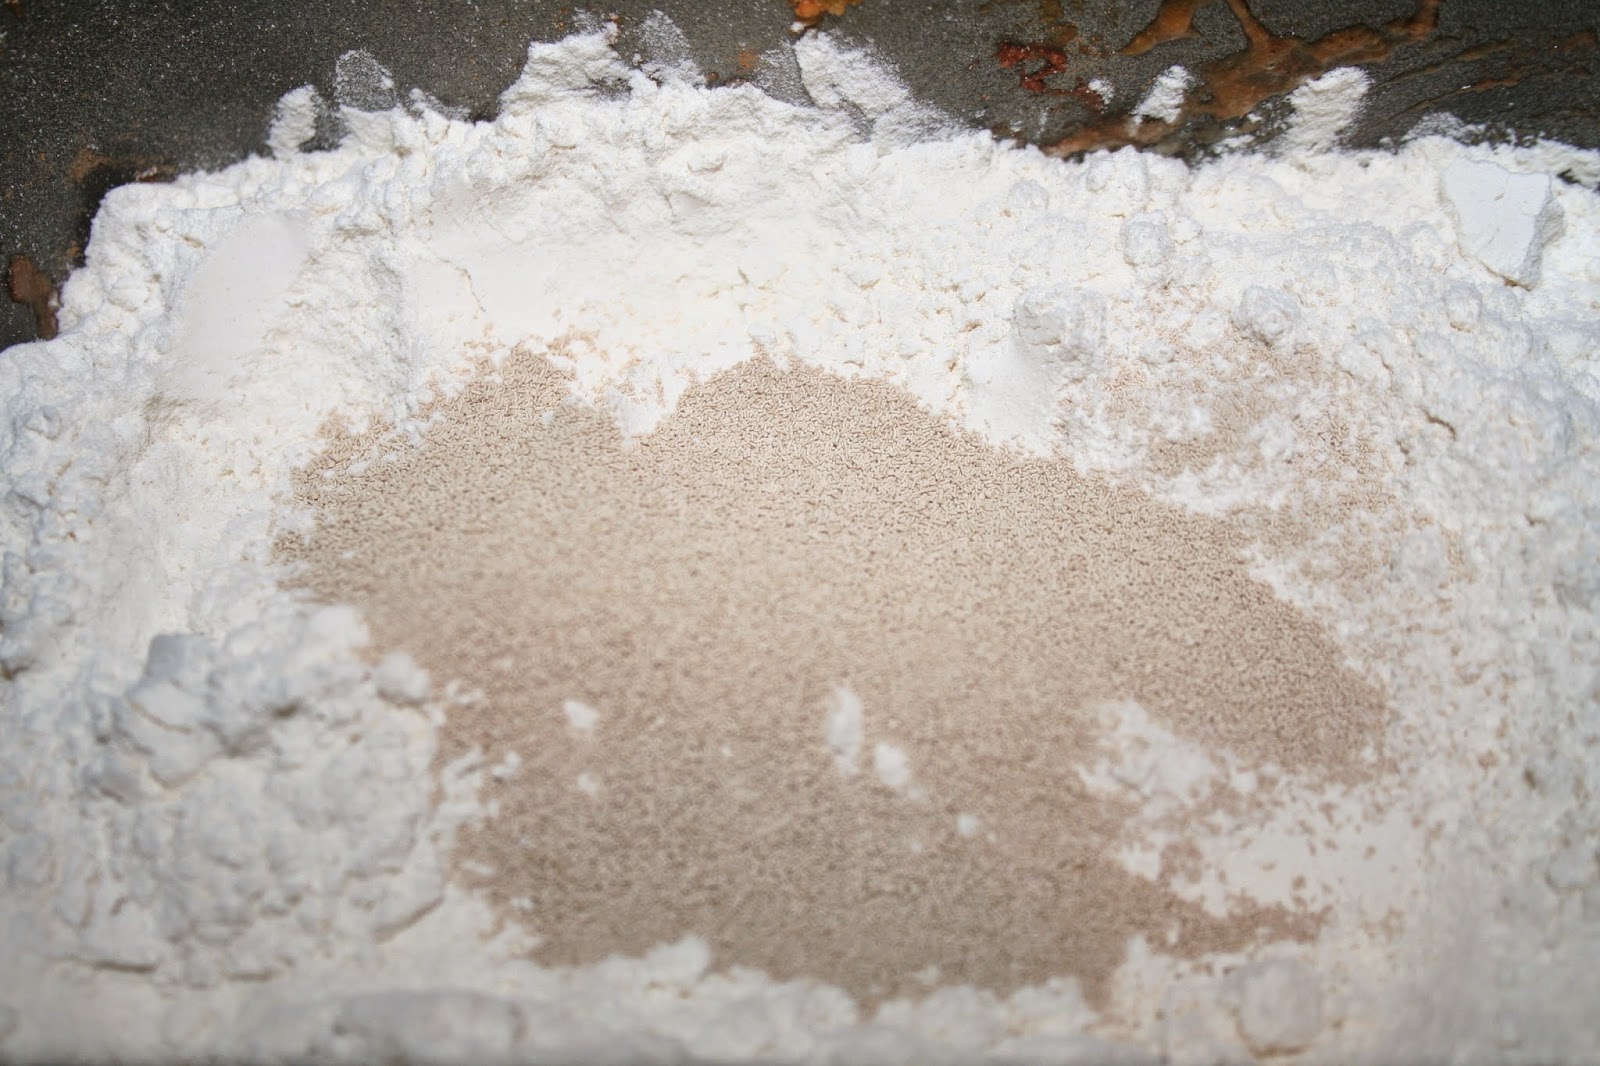
Topped it all with the yeast.  The instructions say to make a well but as long as the flour is flat, it turns out great.


I use the Fleischmann's Bread Machine Yeast normally but the price of it got so expensive at the store that I looked into other options instead of paying $6 per small jar.


My parents bought me a two pack of these bricks of yeast.  They sort of looked like shorter packages of coffee where they are compacted and look like you are going to open it and see a brick but luckily, it is exactly the same yeast so I get to fill a small mason jar and the old yeast jar with each package.  My dad got it the first time and showed up with them and I was totally freaked and made him return them.  After the yeast prices went up again, I decided to figure out how to use it if it killed me.  I have already opened my second one and I am excited to say that they work exactly the same.


 The bread machine ran the dough cycle and I got a huge mound of pumpkin bread.  This would have been great cooked just like this because of the great flavor and moisture but there was another step that I thought was amazing!

Roll it out on a floured surface with a rolling pin.  It helps to get all the bubbles out.  If you are better than me, yours will be square or even.  I stink at that but it really doesn't matter too much to the final bread.


Then, spread butter or margarine over the top of the dough.  I used to use melted butter but it is way easier to spread and use softened butter because it doesn't run off the end of the dough.  It is way easier to keep your cinnamon and sugar away from the edge....I didn't do a great job of that this time but leave an edge on yours.


Spread lots of cinnamon and sugar over the top of the buttered dough.  Next time I would use even more but leave a little more at the edge because this needed a little more room then my cinnamon rolls do at the edge because you need to seal the bread dough.


After it is totally topped, you roll the bread into a big long tube just like with cinnamon rolls.


My dough was so long that I decided to make one good sized loaf and one smaller one by cutting the dough in half.  Here are the two loaves that I got.


One rose all the way up like a big loaf of bread so I was wondering how I would have made this into one loaf as the recipe called for but I am glad that everything stayed in the pan while rising.


I baked the loaves and the larger one rose even more and you can see the side layers were sealed as well as I could have.


After they cooled off, I took one out of the pan to test it out.  It smelled amazing so I couldn't wait to test it out!!!


When I cut into the loaf, I was a little sad because the top came up far from the top of the loaf.  I didn't do a great job securing the layers so I think that it rose a little differently but everything was cooked evenly so that it all that mattered.


I ate the heel of the bread while waiting for two other pieces to toast.  The top got a little brown but it was totally perfect to see this yummy cinnamon swirl through the whole toast.


If you look close up, it was even harder to butter because the layers were a little separated.  I think that I had the most fun unrolling and eating the bread just like those little store bought cinnamon rolls of my childhood.

My husband wasn't a big fan because he said it didn't have enough cinnamon in the bread which I can't disagree but we are a really cinnamon family.  I would top it with lots more cinnamon and try to seal it better so that it doesn't rise unevenly.  I am hoping to make this age around the holidays and hope that it lasts long enough for some french toast.  YUM!!  It would make the more perfect french toast.

I hope that you try this recipe to and see how you like it because it is really worth the little bit of time that it takes to make a homemade loaf of something just a little different.  It has all the benefits of the cinnamon roll without the tons of added fat and calories.  Here is hoping you enjoy it too!!  Check out this recipe and more on Eat Cake for Dinner because she has some amazing recipes including this one.


Pumpkin Cinnamon Swirl Yeast Bread


Ingredients
Bread:
  • ¾ c. canned pumpkin puree, room temp.
  • ¼ c. warm water
  • ⅓ c. warm milk (microwave for 20 seconds)
  • 1 Tbsp vegetable oil
  • ¼ c. brown sugar, lightly packed
  • 1 tsp. salt
  • ¼ tsp. nutmeg
  • ½ tsp. cinnamon
  • 1 egg, lightly beaten
  • 3 c. bread flour, approximately
  • ¾ Tbsp instant yeast 

Cinnamon Sugar Swirl:
  • 1½ Tbsp butter
  • ½ c. light brown or white sugar mixed with 2 tsp. cinnamon
Instructions
  1. Add pumpkin, water, warm milk, vegetable oil, brown sugar, salt, nutmeg, cinnamon and egg to the bread machine pan (Add ingredients to bread machine in the order recommended by the manufacturer if different from before). Add the flour. Make a well in the top of the flour and add the instant yeast. Turn the bread machine on the dough cycle and let it do all of the work (my dough cycle takes 1½ hours). You will want to check it at first while it is mixing, to make sure you have enough flour. The dough should be slightly sticky to the touch, but will stay in a ball as the bread machine mixes. I used exactly 3 cups of flour and it was perfect. If your dough is way too sticky, add a little extra flour, but don’t over-do it.
  2. Once the dough cycle has finished and the bread has risen, punch down dough and remove from bread machine pan. Place dough on a lightly floured surface and knead a few times, just to release the air bubbles. Roll out dough to a 9”x22” rectangle. Spread top with butter and sprinkle with cinnamon and sugar mixture, leaving a ½-inch border around the edge.
  3. Roll up tightly, beginning with the short end and pinch end together to seal. Place in a greased 9”x5” bread pan (or two); cover with a moist kitchen towel and allow to rise until almost doubled. Preheat oven to 375 degrees and bake for 30 minutes. Tent with foil for the last 10 minutes to prevent the crust from browning too much (of course if you forget like me, you get a little darker bread). If you tap on the bread, it will sound hollow when it is finished. When finished baking, run a knife around the edge of the pan and remove bread to cool.

Monday, October 13, 2014

Menu Plan Monday 10/13


Monday- Chicken Nugget Wraps with homemade fries
Tuesday- Rosemary Chicken with roasted potatoes and asparagus
Wednesday- Tacos
Thursday- Olive Oil Pasta with pan fried zucchini or Three Cheese Marina with oven fried zucchini
Friday- Chicken and Rice Casserole
Saturday- Leftovers/Breakfast for Dinner
Sunday- Leftovers/Chuck E Cheese

I am super tired of not having a menu plan in place for the month because I am a mess when I don't know what I am making for dinner.  I tried to nail down the rest of the month but there are so many things going on that I always seem to be trying to figure out what is going on with the calendar and going back and forth is making me dizzy!  I think that I filled in a lot but I am hoping to get the rest of the blanks filled in too. At least I got this week done.  Hope you have a good week planned.

Saturday, October 11, 2014

The Secret Book Review

I wanted to read a little bit more Amish fiction and since I really like Beverly Lewis, I went straight for her books in the library.  There was one that had the whole series so I grabbed it because I was ready to read.  I wanted to start with the first book in the series The Secret (Seasons of Grace, Book 1) by Beverly Lewis
but I got totally taken off course by lots of books to read and review.  Luckily after a few renewals, I got a chance to read this series.


Grace Byler and her bothers and sisters know that her mother has secrets and her mother weep in the night and takes long walks. Her father still won't talk about and doesn't want to admit that there is a problem because he is a very quiet person who is not prone to talking.  One early morning, her mother leaves a note for Grace and leaves the family home with the help of a driver to the train station.  Grace is reeling and turns her life upside down by breaking up with longtime beau who she was supposed to marry. Left to pick up the pieces of her life, Grace questions all she has been taught about love, family, and commitment and whether she wants any of it. Heather Nelson is an English grad student, stunned by a doctor's diagnosis so she decides to go to Amish country where her mother loved to go. In denial and telling no one she is terminally ill, Heather travels to Lancaster County the last place she and her mother had visited together and the location of the homopathic doctor who is going to help her. Pick up the book and find out what happens in the life of all of these people that are in this small Amish town.

I enjoyed this book but I was sad when it was over.  Until I realized that I had the next book in the series!!  It was a great story and there was a secret that was kept through most of the book that had you wondering what it was going to be.  Even though the process, you were meeting all of the great characters and making it feel like you were part of the family.  There was a lot of feeling that you wanted all of the characters to have their problems resolve quickly and easily.  Life doesn't always go that way and it doesn't for most of the book but you will have to pick it up at your local library or bookstore to find out more details on what happens in this great start to the Seasons of Grace series.  I hope that you enjoy it as much as I did.  Stay tuned for the review of the second book soon!!!

Friday, October 10, 2014

September Reading Review

I had a busy month last month with the end of summer and still got lots of books read.  This month is the beginning of school so I had high hopes for getting lots of books read since I was hoping to have more free time but it just didn't seem like I did have more time.  With my son in school and the to do list mounting, the reading took a back seat to many of the other things that had to get done.  I also took on a bunch of days working at my son's previous preschool which for any of you that deal with kids all day know that is exhausting!!!  I didn't get as much reading done as I thought it but lots of great books this month!

by Susan May Warren 


by Mitch Albom


by Betsy St. Amant


by Francine Bryson


by Shelley Shepard Gray


Hidden in the Stars
by Robin Caroll


Deadly Heat
by Richard Castle


Wild Storm
by Richard Castle


Books Read for 2014

January     8
February    9
March       6
April          6
May          8
June          13
July          10
August       9
September  9

Total Books   78

Wednesday, October 8, 2014

Kids Wednesday: How to Learn More About Your Kids Day at School

I sent my little man to kindergarten this year and it seems like he has lost the ability to take about his day.  I used to pick him up at preschool and I would get the play by play of everything that happened including snack, work time and what everyone said during the day.  I didn't have to prompt him to get information, I just had to try to stop him long enough to get him out of the car when we got home because he was still talking.  Now either the longer day or coming home on the bus, I am hearing nothing about his day. 

Do you want some solutions to this problem??  Check out this post about great questions!!


I usually use some of the basic questions to get past only hearing about lunch or recess like what is one thing that you learned today or one thing that your teacher taught you. 

My favorites are:

#6.  If I called your teacher tonight what would she tell me about you?

#12.  If an alien spaceship came to your class and beamed up someone who would you want them to take?

I don't know if I would want to know the answers to those but they might lead to some interesting dinner conversations!  Let me know which ones are your favorites and make an effort to ask your kids something a little different and you might get an interesting answer!!!

Tuesday, October 7, 2014

Homemade Freezer Biscuits

I decided that I wanted to have some yummy biscuits because I bought my favorite raspberry jelly and although I liked my last recipe, I decided to try another one.  It is always good to try a new recipe just in case! You can check out the new recipe here.

I mixed the dry ingredients in the mixing bowl. I used the Kitchen Aid mixing bowl (so that I could do the easy way in the mixer) but you can certainly do it by hand if you wanted.


I cut up the butter in small pieces.  I normally skip this step because I am lazy and I know that if I use a pastry blender it is just a little more work to get the butter mixed up but not too much more.  I just like to follow the recipe the first time trying it and it worked like a charm.


I added the butter to the dry ingredients and mixed them with the electric mixer which incorporated them nicely but you could do it with a pastry blender or forks if you wanted to.  It was so easy and quick with the blender that it made me wonder on a few of my other recipes that I still do by hand!!


I added the milk and got a sticky dough.  It got really sticky and very quickly.  For this recipe, I used coconut milk because I have a cupboard full but anything works.  I feel like the coconut milk might have made this stickier or else I am a bad "measurer."


I put a little flour on the counter top and put the dough on top.  Make sure you flour your hands because you are going to need it or loose half of the dough stuck to your fingers.


I topped the dough with flour and pressed it down until it was the desired thickness.  If you want, you can roll it out but I am all about not having to wash more things then necessary so I don't usually use it for biscuits.


I floured the cookie cutter and cut out the large biscuits but feel free to use whatever size you want.  If you don't have round cutters, use a mason jar or glass which work perfectly.


When they come out, they have risen nice and high and have a perfect crack in the middle so that you slice them right down the middle to have a yummy snack or breakfast.


I put my fluffy biscuit on my plate and was so excited to get to eat it.  Even though it was right before dinner, I wasn't going to wait for them to cool down and reheat one later.


I cut in and buttered the biscuit and topped with my favorite jelly which is the Smucker's Natural Raspberry Jelly.  I splurged at the grocery store and got this on sale for $1.  I can't wait to have lots of biscuits with it.  When I made the biscuits, my husband said..."Oh yeah right, you got your jelly." Like that was the reason that I was making biscuits...okay maybe it totally was but it was worth it.


The even better part is since I am the only one in the family that eats them, I got to make 5 and freeze 6 of them to make later.  It is supposed to be really easy to defrost and cook but I haven't done it yet.  I look forward to trying and I was excited to be able to make a "double" purpose batch to eat and freeze which I look forward to doing again in the future.  I didn't get to the last biscuit before it molded so I was a little bummed that they didn't last any longer.  That is the great news for freezing them because you can make only as many as you need.


The only downfall in this recipe for me is that it uses a lot of butter and baking powder so there are a lot of other recipes out there that might fit a lower budget because they aren't using as much butter.  I actually just used margarine and they were good and at a lower price.  It is a perfect option for those who don't want to use shortening because many biscuits use shortening.  I don't have a problem with using either and like to try out the recipe as is first to see how the original tastes before I make any changes.  I hope that you try these out and see if you like them because I thought that they were light and fluffy.  Make sure you check out the original post and some of the other great recipes that are on the blog at Ten At the Table.

Homemade Freezer Biscuits


Ingredients:
  • 4 cups all purpose flour
  • 2 Tbsp baking powder
  • 1 teaspoon salt
  • 1 cup cold butter, cubed
  • 1 3/4 cup milk or cream
Instructions:
  • Mix dry ingredients together. Add in the butter and mix until crumbly. (If you have one, you can use a KitchenAid or food processor to save time and effort). Add in the milk and mix until a ball forms.
  • Roll out onto a floured surface and cut into biscuits.
  • Freeze on a cookie sheet for 1-2 hours. Then remove and place in a airtight freezer bag.
  • To cook it, pull the desired number of biscuits out and let thaw for 30 minutes to an hour (or move them to the fridge the night before). Bake at 450 degrees for 8-12 minutes.